How to Record Screen on Windows 10: Your Complete Guide
Recording your screen on Windows 10 can serve many purposes, from creating tutorials to capturing gameplay. In this article, we’ll cover effective and easy methods for how to record screen on Windows 10. Whether you need to record computer screen Windows 10 or capture specific content, this comprehensive guide will help you get started!
Understanding the Windows 10 Recording Tools
Windows 10 comes equipped with a robust native feature known as the Game Bar, specifically designed for screen recording Windows 10. This built-in tool allows users to effortlessly record video on Windows 10, be it gameplay, tutorial videos, or any other on-screen activities. To access the Game Bar, press Windows Key + G. This opens a toolbar where you can see performance metrics, access capture options, and manage settings. Moreover, it includes options for record audio while screen recording, allowing you to narrate your actions seamlessly.
How to Enable Game Bar
Before using the Game Bar for recording gameplay Windows 10, you must ensure that it is enabled. To do this, navigate to Settings > Gaming > Xbox Game Bar, and toggle the switch to enable it. Once activated, you can record by pressing Windows Key + Alt + R. Make sure your device meets the necessary hardware specifications, including a compatible Graphics card for optimal performance.
Optimal Screen Recording Settings
Adjusting your screen recording settings Windows 10 is crucial for ensuring high-quality outputs. Select frame rates, resolution, and audio options that align with your project goals. Using 60FPS at 1080p is commonly recommended for smooth playback. You can tweak these settings within the Game Bar settings or through the Windows 10 recording tool to match your specific needs.
Step-by-Step Guide to Using Game Bar for Recording
Once you’re equipped with knowledge about the Game Bar, it’s time to learn how to use Game Bar effectively. Here’s a step-by-step guide that can help you hit the ground running.
Recording Your Screen
To record screen Windows 10, use the following steps:
- Press Windows Key + G to open the Game Bar.
- Click on the ‘Capture’ widget.
- Click the ‘Record’ button or use the shortcut Windows + Alt + R.
- Perform the tasks you want to capture on your screen.
- To stop recording, press Windows + Alt + R again.
Your recorded videos will save by default in the Videos > Captures folder.
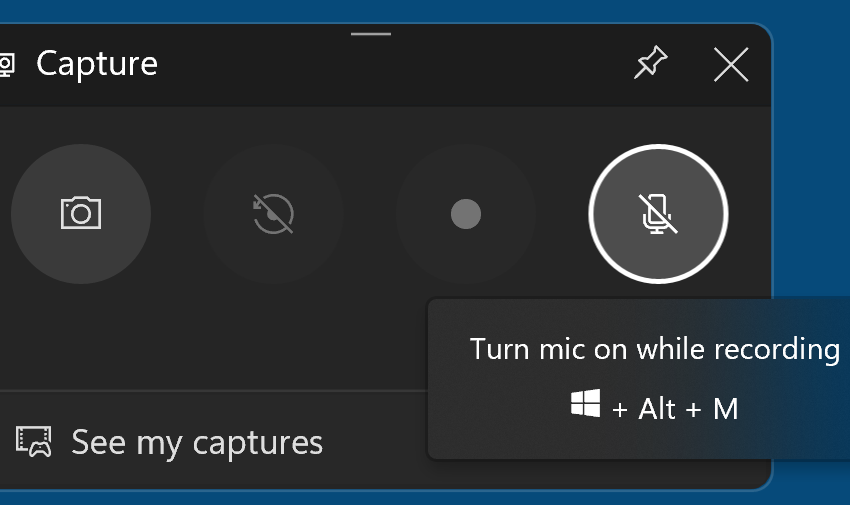
Record Screen with Audio
Integrating audio into your recordings can enhance engagement. To record screen with sound, ensure that the ‘Audio’ toggle is turned on while you are within the Game Bar. This allows you to capture both system notifications and your microphone input. This feature is particularly useful for creating video tutorials Windows 10, lectures, or gameplay commentary.
Alternative Screen Recording Methods on Windows 10
If the Game Bar doesn’t meet your needs, various alternative screen recording software Windows 10 options provide enhanced features. Whether you require more advanced tools for editing or options for how to record Skype calls Windows 10, there’s an option available for you.
Third-Party Screen Recorders
Several free screen recording applications can exceed the capabilities of the Game Bar. Software like OBS Studio, CamStudio, or Bandicam offer versatile options such as live streaming, recording with overlays, and editing capabilities. To get started with any of these applications, download the software, install it, and follow their setup guide for an effective recording experience.
Screen Recording Without Software
If you want to record your screen without installing any software, consider using online recording tools that run in the browser. These tools can record your screen alongside audio with minimal hassle. Always ensure that your internet connection is stable while using online solutions to avoid interrupted recordings.
Editing and Saving Your Recordings
<pAfter recording your video content, you may want to improve it through editing. Whether you wish to trim, add annotations, or improve audio quality, here’s how you can proceed with editing your recordings and saving them properly.
Editing Screen Recordings with Built-in Tools
Windows 10 offers basic video editing capabilities through the Photos app where you can trim clips, apply effects, and quote the initial video clip. Just right-click your video file and select “Edit” to launch the Photos editing interface, which allows you to create a polished final product effortlessly. This is particularly useful for users looking to enhance their recorded content quickly.
Best Practices for Saving Recorded Videos
When saving your recorded videos, consider compressing files if necessary, especially if you’ll be sharing them over the internet. Common formats include MP4 and .WMV. Ensure you organize your recordings in designated folders and collaborate or share them through cloud services like OneDrive for easy access.
Key Takeaways
- Windows 10 offers built-in tools like Game Bar for straightforward screen recording.
- Ensure you capture audio by adjusting Game Bar settings appropriately.
- Explore third-party software if you require advanced features.
- Edit using Windows’ built-in tools for a polished final product.
- Save your recordings in organized locations and preferred formats for easier access.
FAQ
1. Can I record my screen without installing software?
Yes, you can use built-in tools like the Xbox Game Bar or online screen recording services that operate in your browser. This way, you can capture your screen easily without the need for installation.
2. Is it possible to edit my recordings on Windows 10?
Certainly! Windows 10 offers basic video editing features through the Photos app, allowing you to trim your recordings, add effects, and refine them before sharing.
3. How do I record my desktop screen using shortcut keys?
You can use Windows Key + G to open the Game Bar, and then use Windows + Alt + R to start and stop recording your screen. Ensure that Game Bar is enabled in your settings.
4. What are the best formats to save recorded videos?
The most widely accepted video formats are MP4 and WMV. When saving your recordings, choose a format that meets your playing and sharing requirements.
5. How do I share my recordings directly from Windows 10?
You can share recordings through OneDrive or any other cloud service, copying the link and sharing it via email or social media platforms for convenient access by your viewers.

